

Artificial Intelligence
This section connects Farin to an AI service to do four jobs: a chat assistant in the corner of your site answers shoppers, text is written in the product and post editor, images are created for products, and in the “Banner Maker” tab a banner is created to fit its exact spot. The cost of each job is charged by the service to your own account, not by Farin.
Where is it? Farin → Tools → Artificial Intelligence
Connection
The master switch for all the tools and the services’ API keys are here. Only the site’s main admin sees this tab. If a store manager has access to this section through Access they see only a message instead of the keys, saying that the text and image tools in the product editor and the “Banner Maker” tab are available to them.
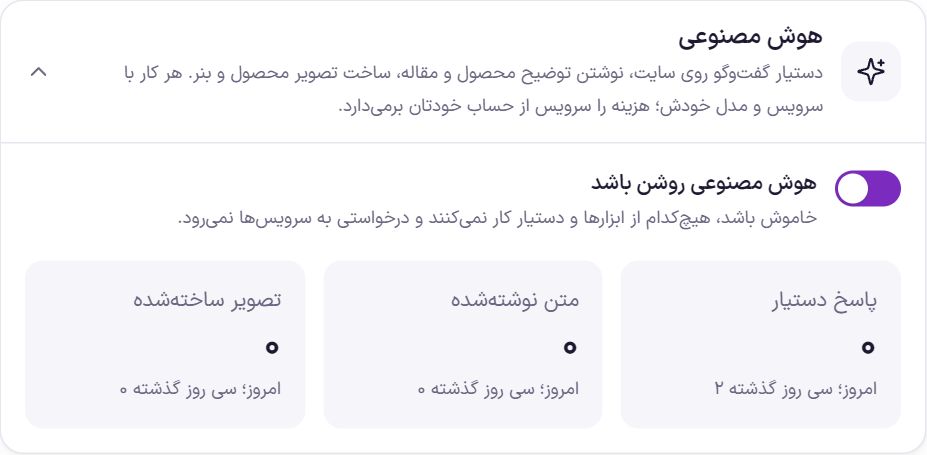
| Option | What it does | Default |
|---|---|---|
| AI enabled | The master switch. When off, the assistant does not appear on the site, the editor and banner tools do not work, and no request is sent to any service. | Off |
| Assistant replies, text written, images created | The number of jobs done today and the total for the last thirty days. A job where the service returned an error is not counted. These numbers are for viewing only and do not limit anything. |
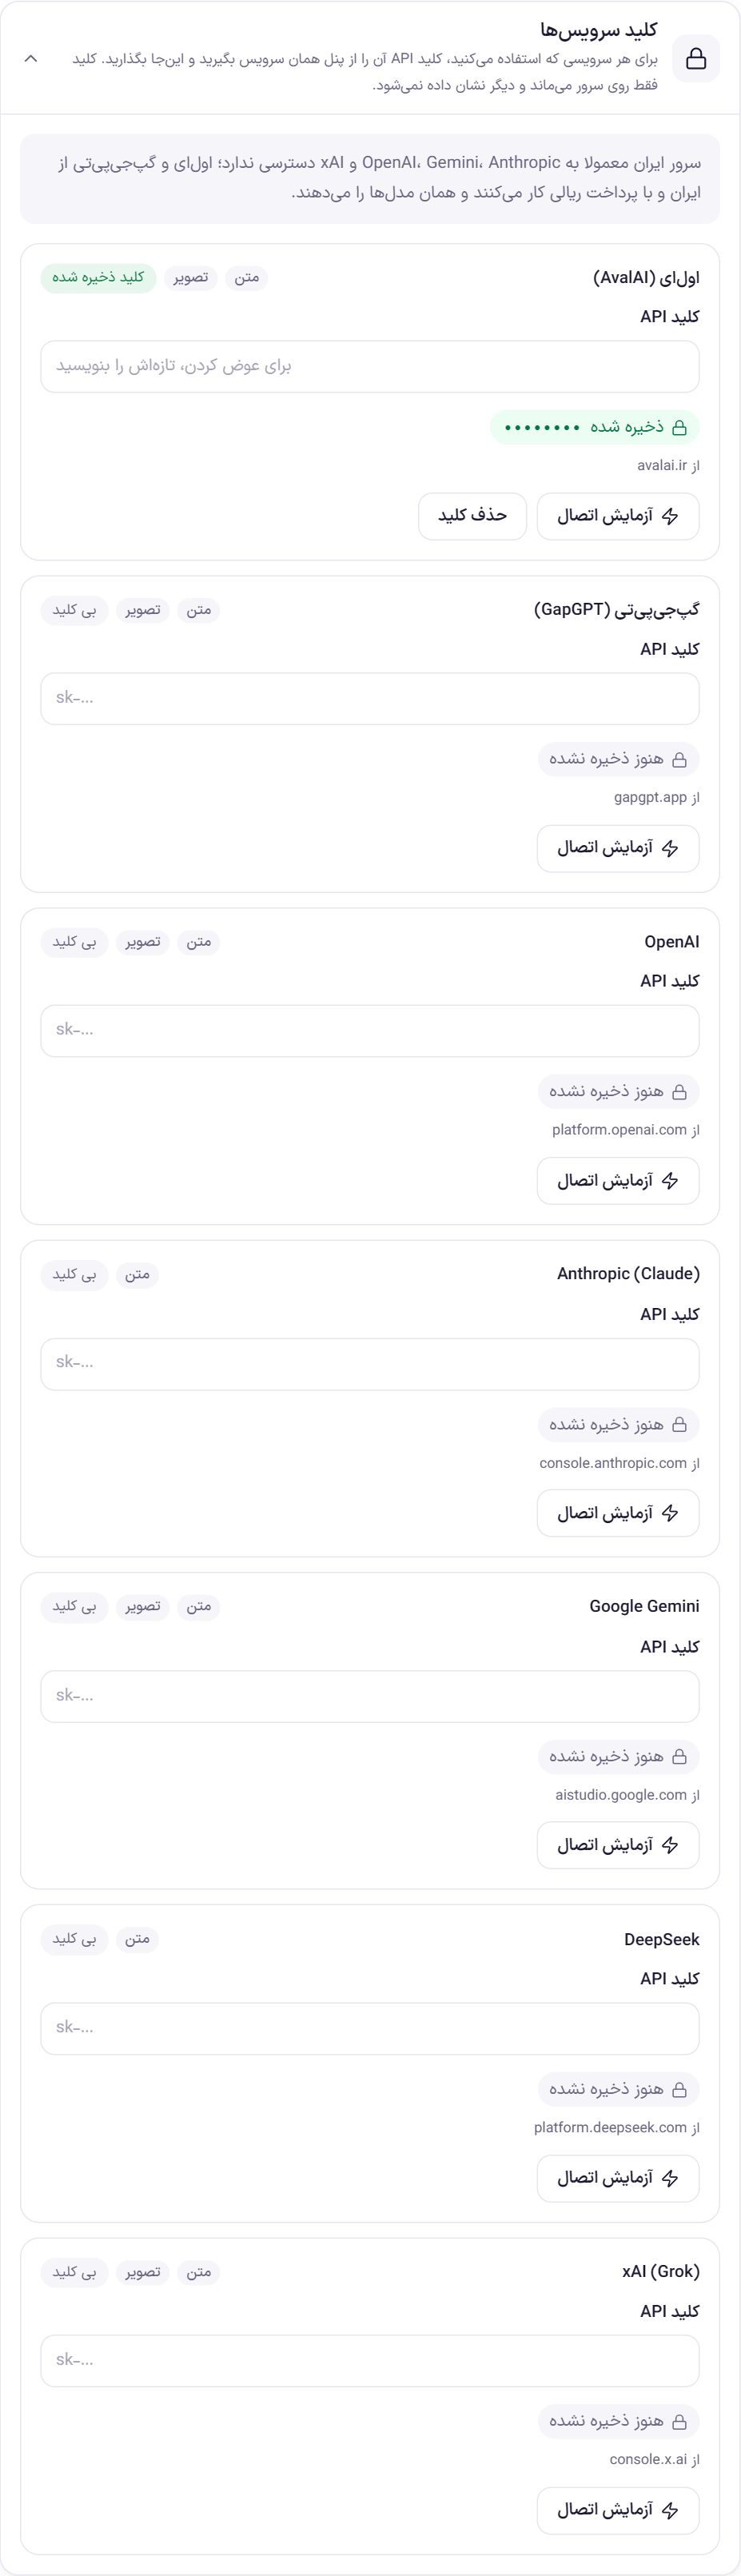
The “Service keys” box has seven services: AvalAI, GapGPT, OpenAI, Anthropic (Claude), Google Gemini, DeepSeek and xAI (Grok). You do not need a key for all of them; only for the service you use. Anthropic and DeepSeek write text only and do not appear in the list of image services.
- Get the key from the service’s panel. Under each box, the service’s website address is written; for example
avalai.ir. Create an API key in your account there and top up your account credit. - Paste the key into the “API key” box. Copy the key completely, with no spaces. If its format is wrong, the message “This key doesn’t look right” appears and it is not saved.
- Click “Test connection”. Farin asks the service for its list of models. If the key is correct, the message “Connection established” appears along with the number of available models. No text or image is generated during this test.
Chat Assistant
A button in the corner of the site that opens a chat window. A shopper asks “Is this product in stock?” or “How much is shipping?” and the assistant answers from the store’s own information. Links to products and site pages appear in the answer as buttons.
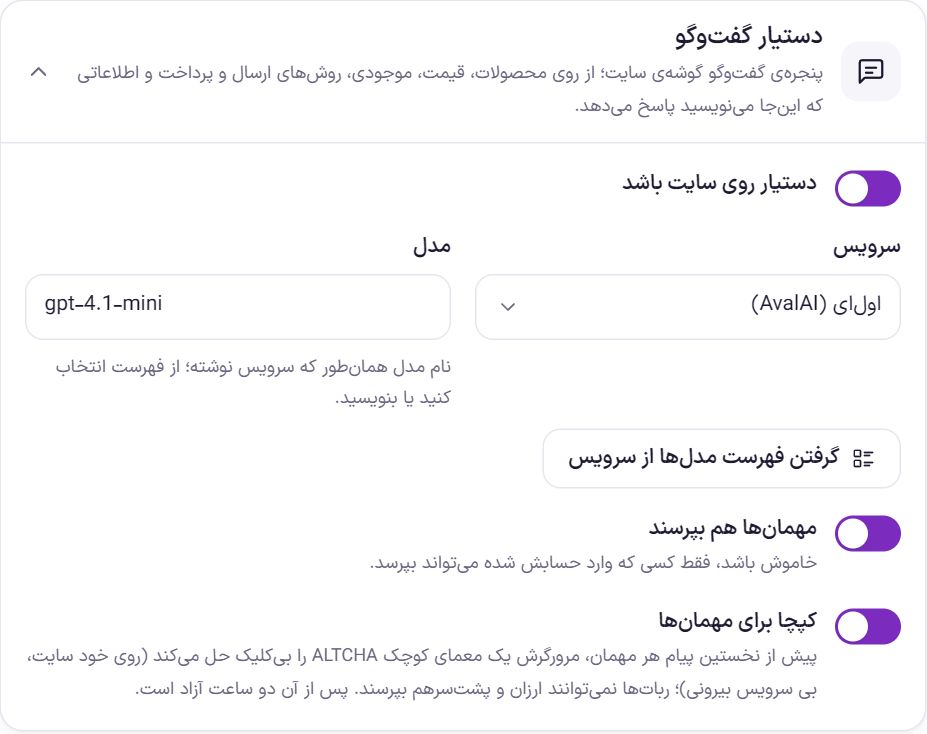
| Option | What it does | Default |
|---|---|---|
| Assistant on the site | Shows the assistant button on the site. As long as AI is off in the “Connection” tab or the assistant’s service has no key, the assistant does not appear. | Off |
| Service | The service that writes the replies. You must have entered its key in the “Connection” tab. | AvalAI |
| Model | The model name exactly as the service writes it. Choose from the suggested list or type your own. | gpt-4.1-mini |
| Get the model list from the service | Fetches the names of the models the service offers with your key so you can choose among them. Only the main admin sees this button. | |
| Guests can ask too | When off, only someone who is logged in can ask. | On |
| Captcha for guests | Before each guest’s first message, their browser quietly solves a small ALTCHA puzzle without asking anything of them. This runs on your own site with no outside service. Bots can no longer ask cheaply, one after another. After that, it is not needed again for two hours. | On |
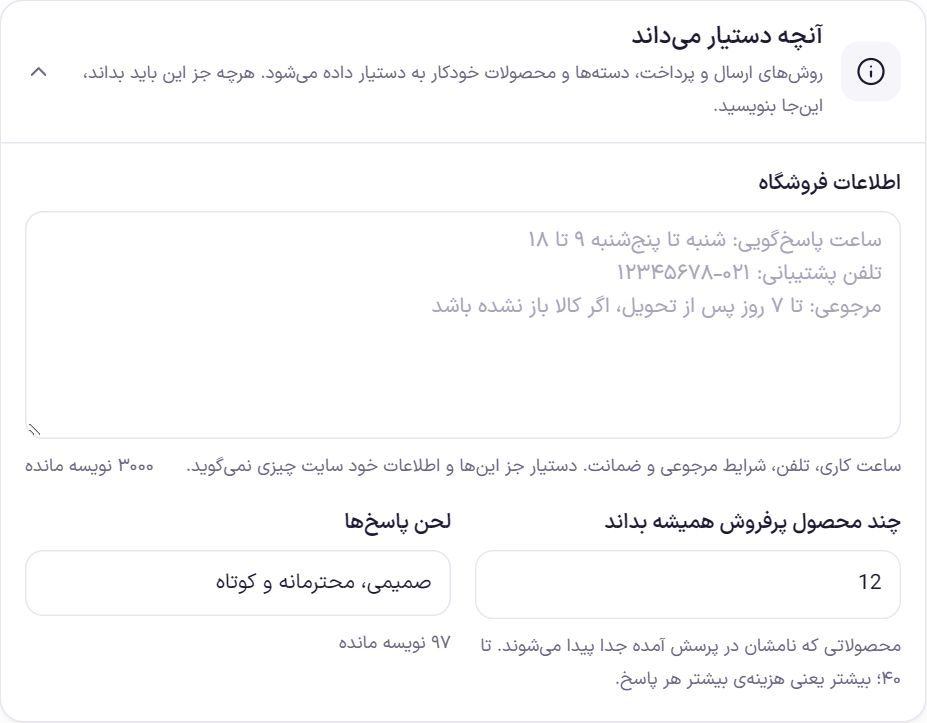
| Option | What it does | Default |
|---|---|---|
| Store info | Business hours, phone, return terms and warranty, up to 3,000 characters. The assistant says nothing beyond this and the site’s own information; so if a question goes unanswered, add its answer here. | Empty |
| How many best sellers to always know | The number of best sellers sent with the assistant in each reply. Products whose names appear in the question are found separately. From 0 to 40; a higher number means a higher cost for each reply. | 12 |
| Reply tone | A few words about the tone, up to 120 characters. | Friendly, polite and short |
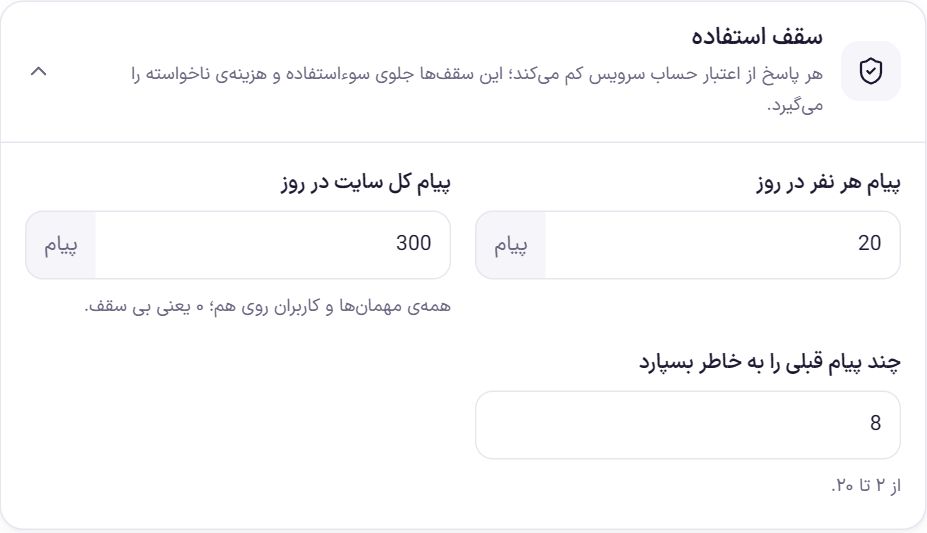
| Option | What it does | Default |
|---|---|---|
| Messages per person per day | A single user, or a single guest by their internet address, cannot ask more than this in one day. From 1 to 500. | 20 messages |
| Messages for the whole site per day | All guests and users combined. Once the limit is reached, the assistant does not reply until tomorrow. 0 means no limit; up to 20,000. | 300 messages |
| How many previous messages to remember | The number of earlier chat messages sent with each new question so the assistant does not lose the thread. From 2 to 20; a higher number makes each reply more expensive. | 8 |
A message the service did not answer is not deducted from the limit. Each person has only one message in flight at a time, so clicking the button twice does not cost twice.
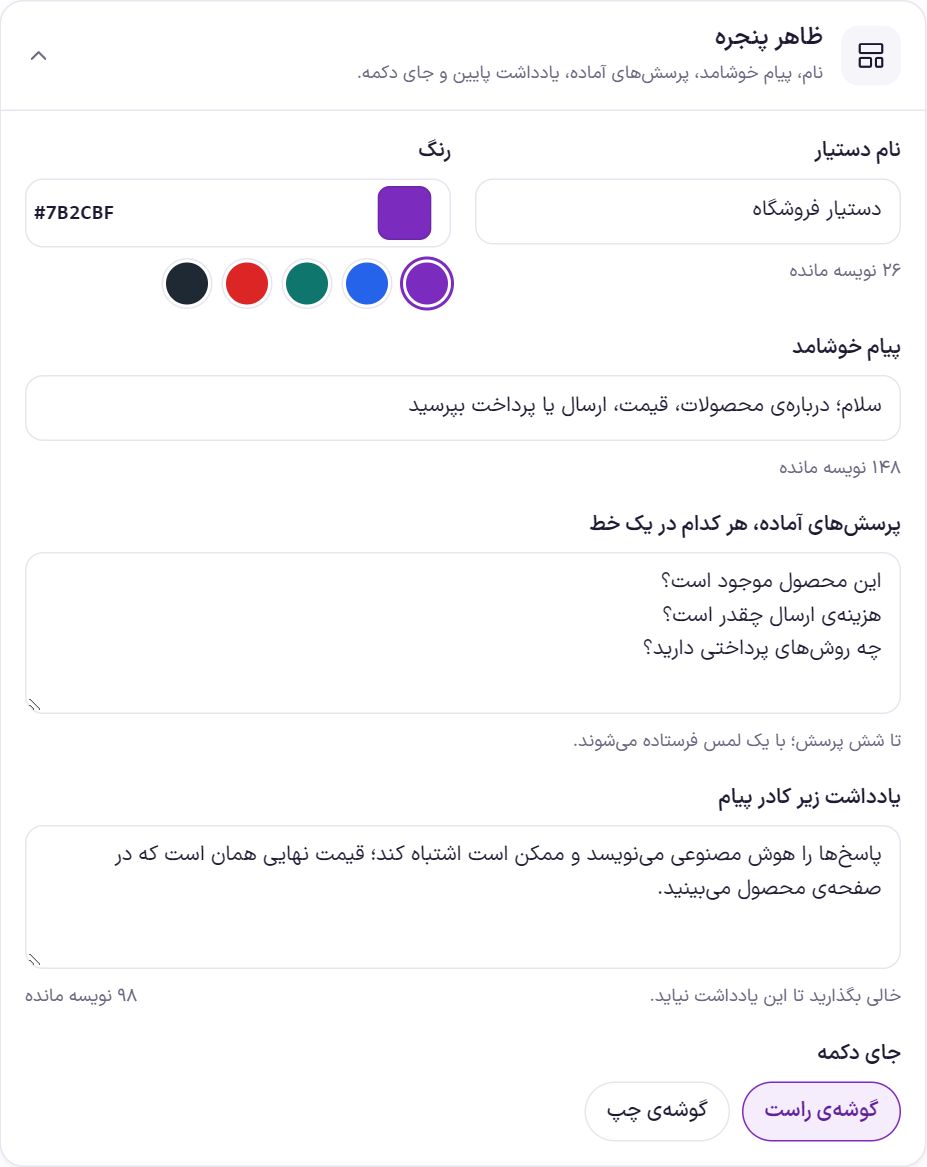
| Option | What it does | Default |
|---|---|---|
| Assistant name | The title at the top of the window, up to 40 characters. The assistant also introduces itself with this name. | Store Assistant |
| Color | The color of the button and window. Choose from five ready-made colors or type a color code. | #7B2CBF |
| Welcome message | The first sentence the shopper sees in the window, up to 200 characters. | Hello! Ask about products, prices, shipping or payment |
| Ready-made questions, one per line | Buttons under the welcome message that are sent with a single tap. Up to six questions. | Three questions about stock, shipping cost and payment methods |
| Note under the message box | A small line under the writing area, up to 200 characters. Leave it empty to hide it. | Replies are written by AI and may be wrong; the final price is the one you see on the product page. |
| Button position | “Right corner” or “Left corner” at the bottom of the page. | Left corner |
Writing Text
This tool is in each product and post editor, in the “Farin AI” box beside the page. For a product it writes the “Full product description” and “Short product description”, and for a post the “Article body” and “Article summary”. The text is built from the product’s title, categories, attributes and price and the notes you write in the box. The model is told not to invent sizes, materials, warranties or numbers of its own.
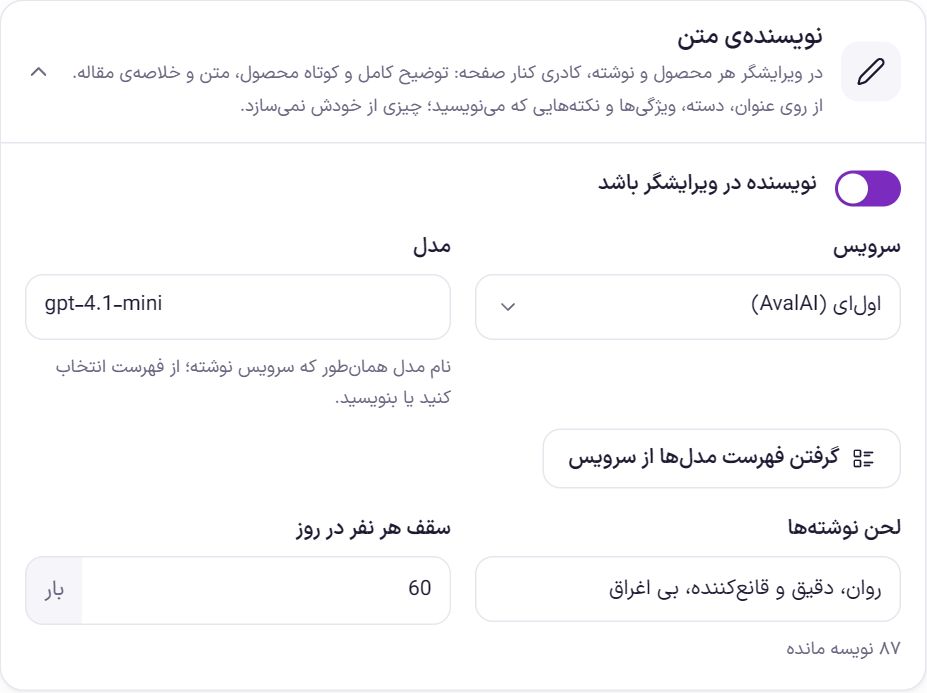
| Option | What it does | Default |
|---|---|---|
| Writer in the editor | Shows the “Writing” section in the editor box. | On |
| Service | The service that writes the text. | AvalAI |
| Model | The model name exactly as the service writes it. | gpt-4.1-mini |
| Get the model list from the service | Same as the assistant tab; it fetches the service’s actual list of models. | |
| Writing tone | A few words about the tone of the texts, up to 120 characters. | Fluent, precise and persuasive, without exaggeration |
| Limit per person per day | A person cannot request text more than this many times in one day. From 1 to 1,000. | 60 times |
- Open a product or post. The “Farin AI” box is beside the page.
- In “What to write”, choose the type of text. If there is something not covered by the title and attributes, write it in “Notes (optional)”; for example, “cotton, suitable for summer, three colors”. For long text, choose the number of sections in “Sections”.
- Click “Write”. A preview of the text appears in the box.
- “Replace” or “Add to end”. The text is placed in the editor where it belongs. Nothing is saved until you update the product or post.
Product Image
This tool is also in the “Farin AI” box of the product editor. It creates the image from the product title or from the current featured image; for example, a photo you took with your phone is placed on a white background. The generated image is saved in the media library. The “Banner Maker” tab uses this same service and model.
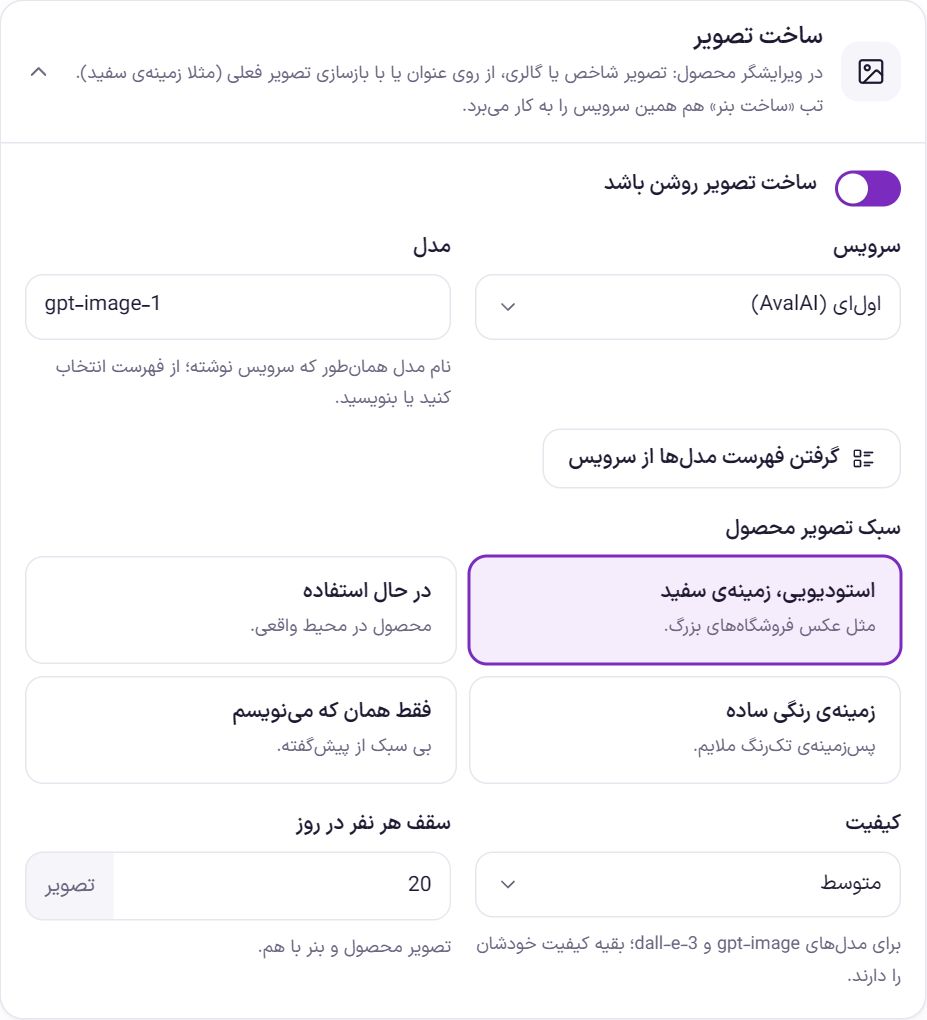
| Option | What it does | Default |
|---|---|---|
| Image creation enabled | Enables the “Create image” section in the editor and the “Banner Maker” tab. | On |
| Service | Only services that create images are in the list: AvalAI, GapGPT, OpenAI, Google Gemini and xAI. | AvalAI |
| Model | The image model name exactly as the service writes it. | gpt-image-1 |
| Get the model list from the service | Fetches the service’s actual list of models. | |
| Product image style | “Studio, white background” like the photos of large stores; “In use” shows the product in a real setting; “Plain colored background” a soft solid-color backdrop; “Only what I write” has no preset style. | Studio, white background |
| Quality | “Low (cheaper and faster)”, “Medium” or “High (more expensive)”. It only affects the gpt-image and dall-e-3 models; the others have their own quality. | Medium |
| Limit per person per day | Product images and banners are counted together. From 1 to 500. | 20 images |
- In the product editor, find the “Create image” section. In “What image (optional)”, write what you want, or leave it empty to create from the title.
- If you want your own photo recreated, click “From current featured image”. The shape, color and text on the product stay the same and only the background and lighting change. This option appears only with AvalAI, GapGPT and OpenAI.
- In “Where to put it”, choose the featured image or the product gallery and click “Create”. Creating an image can take a few minutes. After it is created, the image settles into place and is saved when you update the product.
The image is saved as WebP, or JPG if the server cannot produce WebP, and PNG if it has a transparent background.
Banner Maker
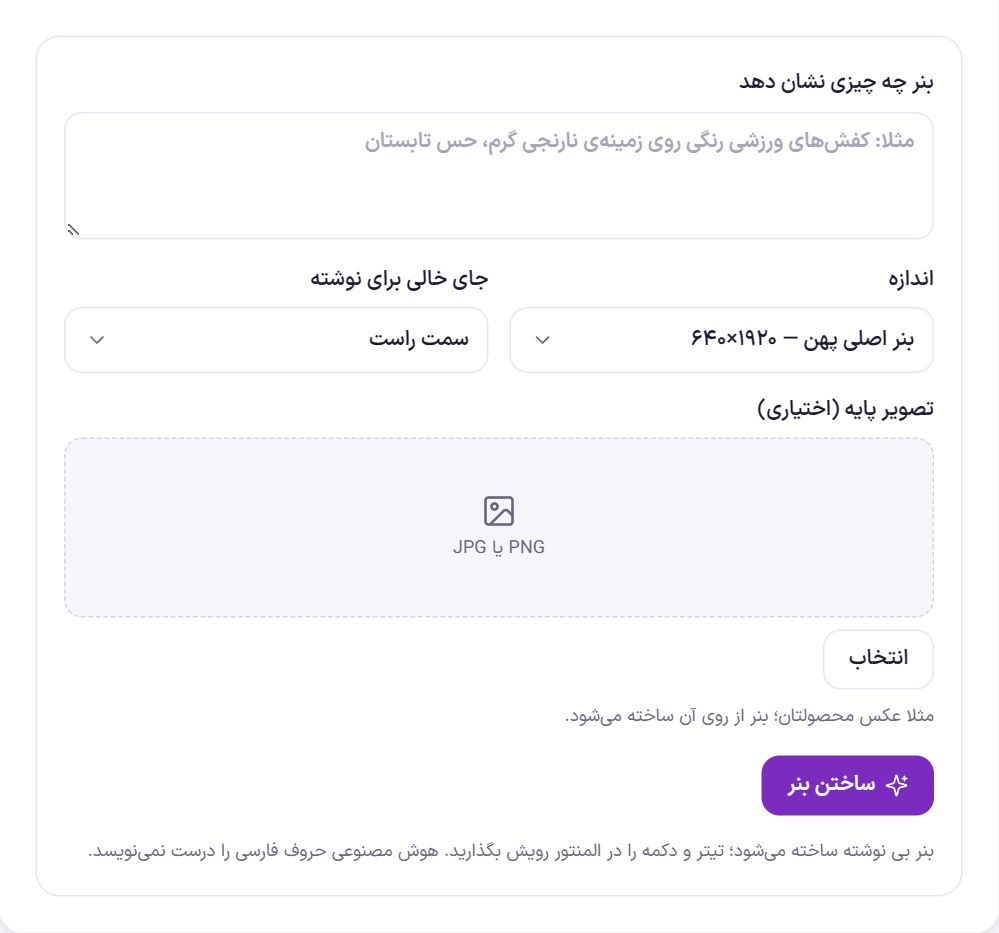
This tab creates a banner at the exact size of its spot on the site and leaves one area empty for the headline. The banner is created without text, because image models do not write Persian letters correctly. Place the headline and button over the banner in Elementor. This tab is also open to a store manager who has access to the AI section. If image creation is off or its service has no key, a message appears instead of the form telling the site admin to turn it on in the “Connection” and “Product Image” tabs.
| Option | What it does |
|---|---|
| What the banner should show | The banner description, up to 800 characters. For example, “colorful sneakers on a warm orange background, a summer feel”. This box must not be empty. |
| Size | Wide hero banner (1920×640), promo strip (1600×500), double banner (1200×600), square (1080×1080), mobile banner (800×1000), story (1080×1920), or “Custom size” with a width and height between 300 and 2560 pixels. |
| Empty area for text | The “Right”, “Left” or “Center” of the banner stays calm and empty so the headline is readable on it. “Not needed” is for a banner with no text. |
| Base image (optional) | A PNG or JPG image, such as your product photo, from which the banner is created. It appears only when the image service is AvalAI, GapGPT or OpenAI. |
- Click “Create banner”. Creating can take a few minutes.
- View the banner. “Open” opens it at full size and “Copy address” copies its address so you can paste it in Elementor. The banner is also in the media library.
- Place the headline and button over it in Elementor. The last eight banners remain under the form in “Recent banners”.
Frequently Asked Questions
I can’t see the key I entered anymore. Where did it go?
The key is still in place. For security, Farin does not show the key after saving and only shows its last four characters. To be sure, click “Test connection”. If you have lost the key, create a new one in the service’s panel and replace it.
“Test connection” gives an error.
Copy the key again, completely, and check that the service account has credit. If the site is on Iranian hosting and you chose a foreign service, the server cannot reach it; try AvalAI or GapGPT.
How much does each reply or image cost?
The service sets the cost and charges it to your account with that service; see the rates on the service’s website. Farin prevents unwanted spending with daily limits. A cheaper model, lower image quality, and a smaller number in “How many best sellers to always know” and “How many previous messages to remember” lower the cost.
The message “Your limit for today is full” appears.
That person has reached the daily limit for that job. The site’s main admin can raise the limit in that job’s tab, or the count starts over the next day.
Farin Theme · 1405