
User Panel
The panel a shopper sees after logging in under “My Account”: dashboard, orders with stages and invoice, address book, wishlist, buy later, and account details. Here you arrange the color, the dashboard texts and the side menu of the panel.
Where is it? Farin → Site content → Users → User Panel
Underneath it is the same WooCommerce account; pages that plugins add to the account also appear in the Farin panel.
Preview
At the top of the page is a preview of the panel with a sample shopper. With “Dashboard” and “Orders” you see two pages of the panel, and with “Desktop” and “Mobile” you change the size.
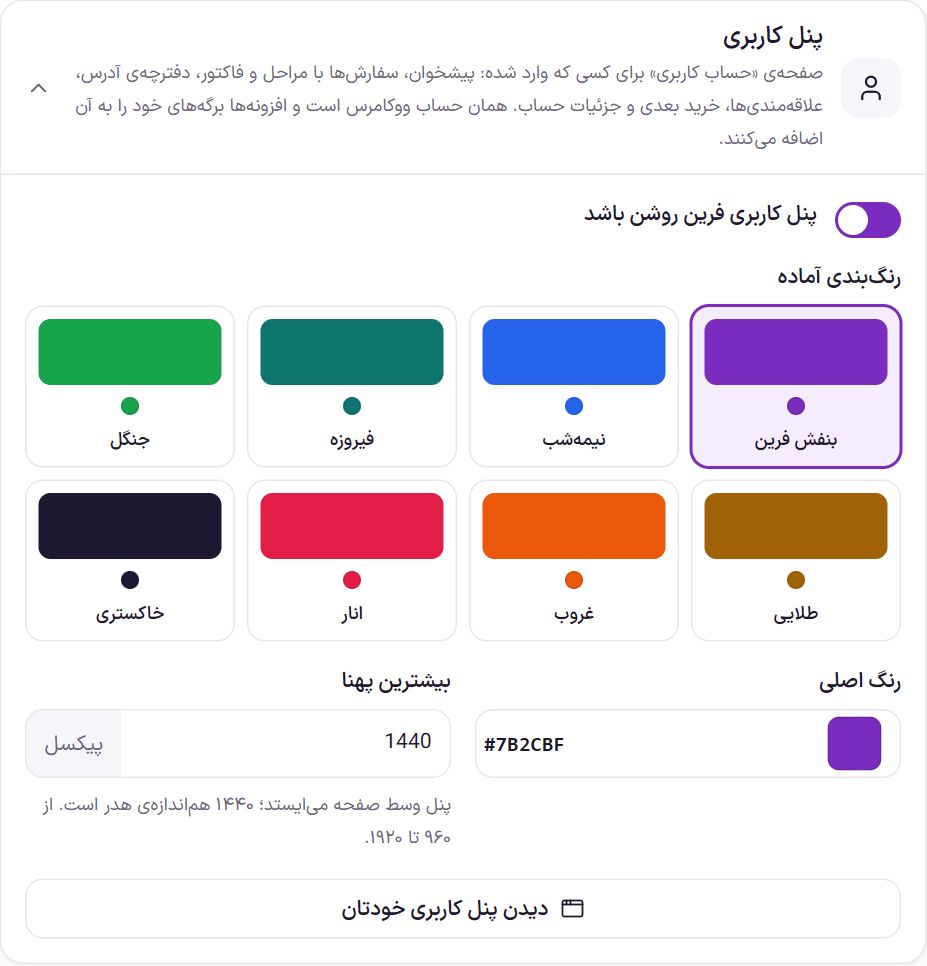
User Panel
| Option | What it does | Default |
|---|---|---|
| Farin user panel enabled | When off, the plain WooCommerce account pages are shown. | On |
| Ready-made color schemes | Eight ready-made colors; the same colors as the Login Page, so the two pages match. | Farin Purple |
| Main color | The color of buttons and icons. The panel’s light colors are built automatically from this one color. | #7B2CBF |
| Maximum width | The panel stands in the middle of the page and gets no wider than this. 1440 matches the header. From 960 to 1920 pixels. | 1440 px |
The “View your own user panel” button opens the account page with your own account.
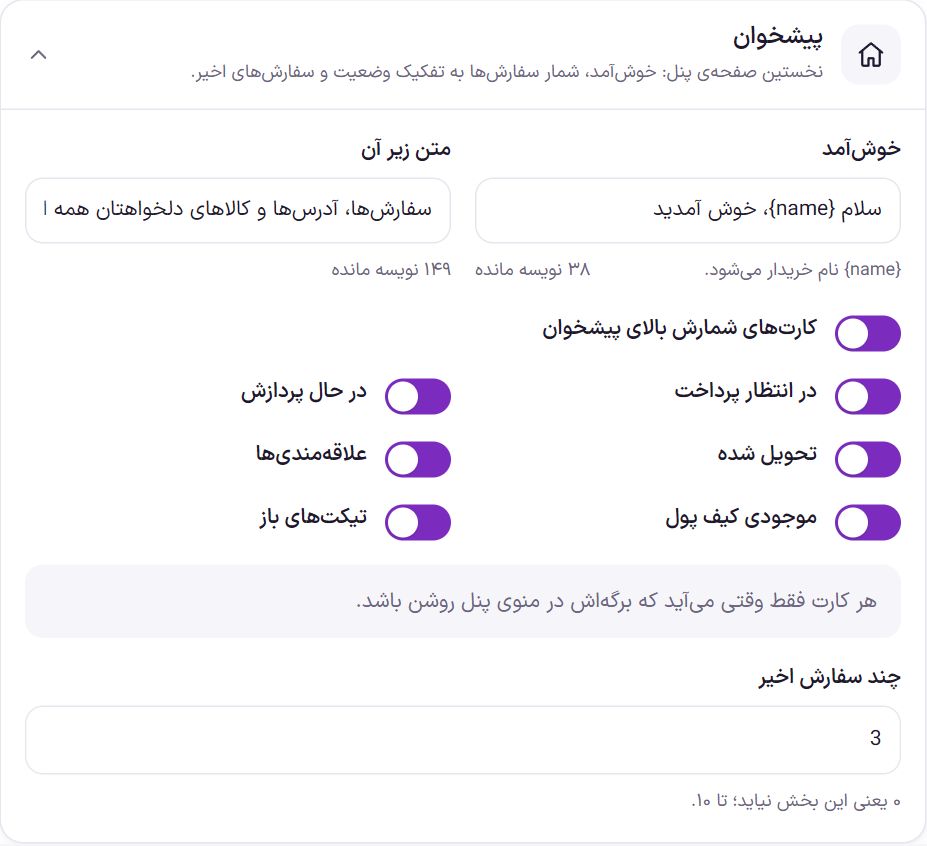
Dashboard
| Option | What it does | Default |
|---|---|---|
| Welcome | The sentence at the top of the dashboard. {name} becomes the shopper’s name. | Hello {name}, welcome |
| Text below it | A short sentence under the welcome. | Your orders, addresses and favorite products are all here. |
| Counter cards at the top of the dashboard | Small cards that show a number. When off, none of them appears. | On |
| Awaiting payment | The number of orders not yet paid. | On |
| Processing | The number of orders being prepared. | On |
| Delivered | The number of completed orders. | On |
| Wishlist | The number of products in the wishlist. | On |
| Wallet balance | The balance Wallet of the shopper. | On |
| Open tickets | The number of tickets that are open for the shopper. | On |
| How many recent orders | The last few orders of the shopper under the cards. 0 means this section does not appear; up to 10. | 3 |
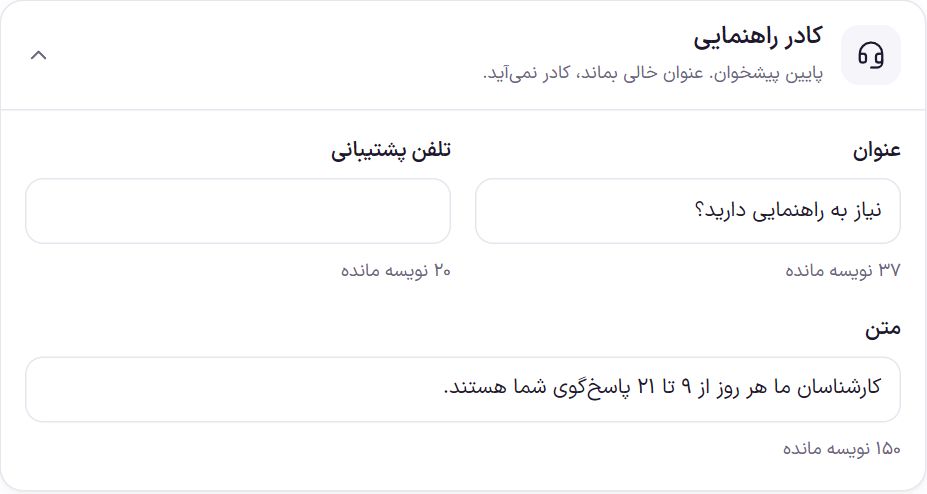
Help box
A box at the bottom of the dashboard for a shopper who wants help. If the “Title” is left empty, the box does not appear.
| Option | What it does | Default |
|---|---|---|
| Title | The box title. | Need help? |
| Support phone | The number the shopper calls, up to 20 characters. | Empty |
| Text | A help sentence, up to 200 characters. | Our experts are available to answer you every day from 9:00 to 21:00. |
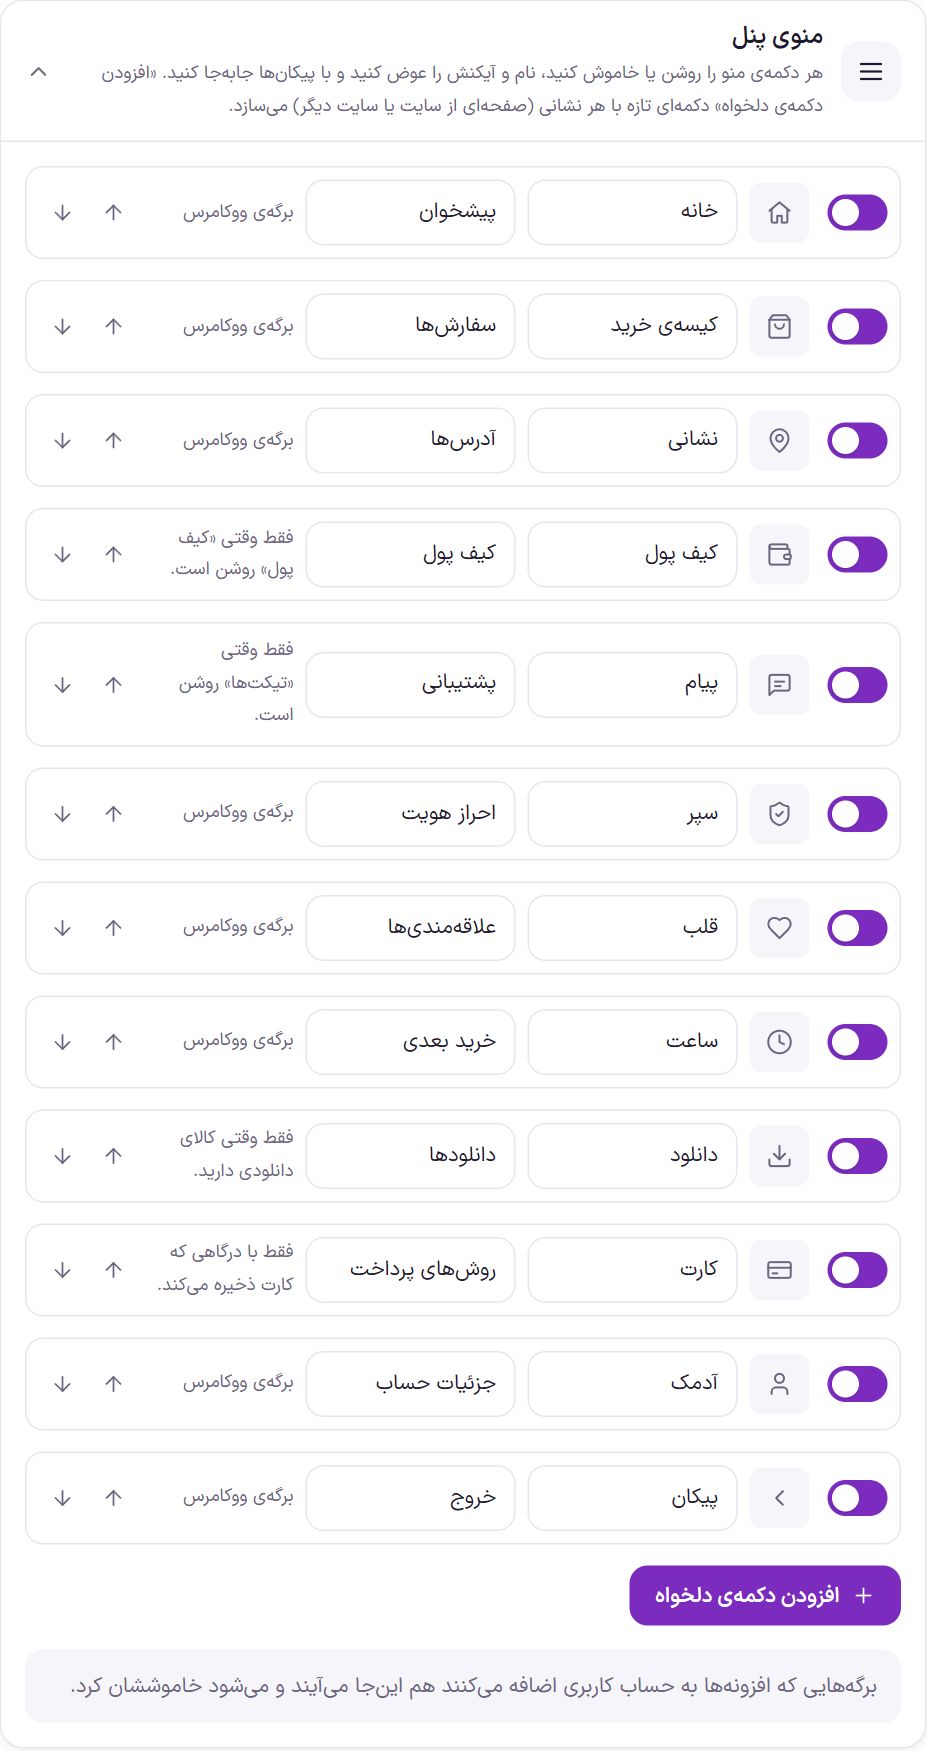
Panel menu
Turn each menu button on or off, change its name and icon, and reorder it with the arrows. Each button’s name is up to 30 characters. Beside each row it says when that page is shown.
| Button | What it shows |
|---|---|
| Dashboard | The first page of the panel. |
| Orders | The shopper’s orders with stages and an invoice button. |
| Addresses | The address book; the same addresses entered on the checkout page are saved here. |
| Wallet | Only when “Wallet” is on. |
| Support | Tickets; only when “Tickets” is on. |
| Authentication | Form Authentication of the shopper. |
| Wishlist | The products the shopper has marked. |
| Buy later | The products the shopper has set aside for later. |
| Downloads | Only when you have downloadable products. |
| Payment methods | Only with a gateway that saves cards. |
| Account details | The shopper’s name, email and password. |
| Log out | Sign out of the account. |
Custom button
- Click “Add custom button”. A new row opens at the bottom of the menu.
- Give the icon and the “Name in menu”.
- Write the address. A page on your own site such as
/shop/or the full address of another site beginning withhttps://. - If you want it to open in a separate tab, check “New tab”.
- Fix its position with the arrows. You delete a custom button with ✕; the built-in buttons cannot be deleted and can only be turned off.
Pages that plugins add to the account also appear in this list, before “Account details”, and can be turned off.
Frequently Asked Questions
I installed a plugin that adds a page to the account. Where does it appear?
It appears in the “Panel menu” with the note “A plugin page”, before “Account details”. You can rename it, change its icon, move it or turn it off.
Why is “Wallet” not in the shopper’s menu?
This page appears only when the Wallet section is turned on. The same goes for “Support” and the Tickets section.
If I turn off the Farin panel, is anything deleted from shoppers’ accounts?
No. Only the appearance changes and the plain WooCommerce pages return. Orders, addresses and account information stay in place.
Farin Theme · 1405